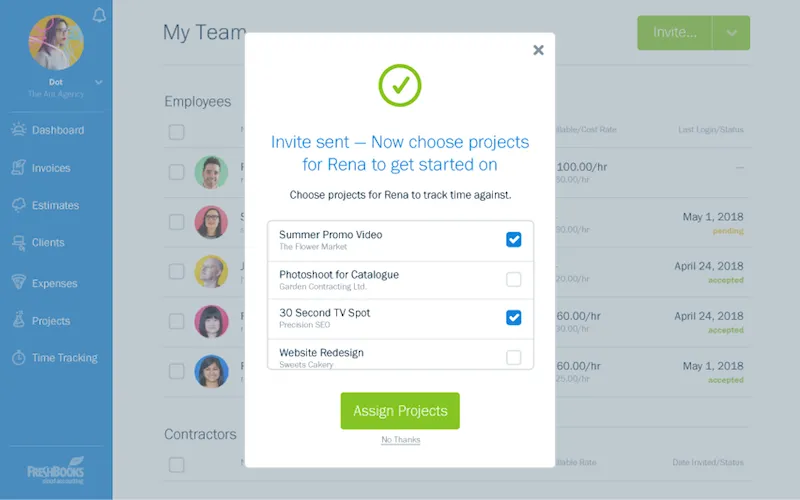
You can now invite and add team members to multiple projects in a few simple clicks - making it easier to work together in one place.

Landing a new project is exciting! It means you and your team get the opportunity to get paid, while knocking it out of the park for your client.
But working with a team can be tough when you don’t have the right tools to collaborate and share your progress. Details get lost, feedback gets missed and versions get mixed up. Pretty soon, working on a project becomes more about managing it…
So to make it easier to coordinate work, collaborate effectively, and hit your deadlines, FreshBooks has simplified the way you invite your team to Projects. Now, you can send an invite, assign a role, and add your team to multiple projects in just a few clicks. Which means everyone can quickly start work on that exciting new Project, all in one place.
What Are Team Invites?
Team Invites allow you to invite team members to FreshBooks to work on assigned Projects. Once assigned to a Project, your team members can share files, leave comments, and see a project’s progress all in one place.
How Do I Invite A Team Member?
Inviting your team to FreshBooks is easy:
- Log into your FreshBooks account
- Once on your Dashboard, click My Team in the left navigation
- Click the green Invite button in the top right corner
- Choose a role to assign permissions. You can learn more about roles here.
- Enter their Name and Email Address
- Add a personal message if needed, then click Send Invitation
- Your team member will receive an email with instructions to log in
What Will My Team Member See When I Invite Them?
Your team member will receive a simple email from you, asking them to set up a FreshBooks account. The email will look something like this, depending on the role you’ve assigned:
How Do I Add My Team To Projects?
When inviting a team member to FreshBooks, you’ll have the option to assign them to Projects. The screenshot below shows you what that looks like:
However, you can also invite a team member to a Project from within a project’s page. Here’s how to do that:
- Log into your FreshBooks account
- Once on your Dashboard, click Projects in the left navigation
- Choose the Project you want to add a team member to
- Click the green Edit button in the top right corner
- Under Project Members, click the + symbol
- Add a team member, and click Update Team Members
What Are Team Member Roles?
Roles allow you to better manage how much access your team has on FreshBooks. There are 5 roles to choose from, each with a unique set of permissions:
- Admin
- Manager
- Employee
- Contractor
- Accountant
Wait: What Exactly Do My Team Members Have Access To?
That’s totally up to you! With roles, you’re able to assign permissions that limit what a team member can and can’t see on FreshBooks. For example, an Admin can see all your financial reports and accounting tools, whereas an Employee can’t. You can learn all about permissions here.
What If a Team Member Leaves?
If you’re worried about a former team member having access to projects, simply delete their account. This removes them from any projects they’ve been added to and removes their access to your whole business. To delete a team member:
- Log into your FreshBooks account
- Once on your Dashboard, click My Team in the left navigation
- Click on the square beside the team member you want to delete
- Above the team list, click the Bulk Actions button
- Click Delete, and then Confirm your choice
FreshBooks Is Always Here for You
If you have any questions on how to invite your team, or how to get started with projects, a team of Support Rockstars is ready to help you out. Contact them here.
Or click here to start inviting your team.
This post was updated in July 2020.
about the author
Dave is a Senior Copywriter currently working for FreshBooks, serving all the amazing businesses using the platform. When he’s not writing, Dave can likely be found binging Netflix alongside his dog Indy.


 New: Delegate Your Workload Using the Manager Role
 Where to Find Accounting Jobs in the U.S. 🇺🇸
 Keep the Train on the Tracks With Project Planning


